Working from a picture
Switch on Start from image, then drop a picture on the box or click it to choose one. Or click Use as input on any picture in your history.
Under the picture: its original size, and these buttons.
| button | does |
|---|---|
| Choose / Replace image… | picks a picture from your Mac |
| Remove | takes the picture out of the box (the file is not touched) |
| Match image size | sets Size to the picture’s shape, up to about 2 megapixels |
| Describe image | writes a description you can use as the prompt |
| Select area to change… | opens the area editor (so does clicking the picture) |
| Clear selection | lets the whole picture change again |
Change
Change sets how far the new picture may move from yours, from 0.01 to 1. The examples show a baseball card across the range.
| Change | result |
|---|---|
| 0.01–0.2 | almost identical: cleaner, sharper, slightly retouched |
| 0.25–0.7 | same picture with details redone; colors and layout kept |
| 0.75–0.85 | same pose and framing; the prompt sets colors, clothes, light, and lettering |
| 0.9–0.95 | a new picture with a similar subject and layout |
| 1.0 | only the prompt matters; your picture is ignored, except outside a selected area |
Prompting
The prompt matters at every setting of Change: describe the picture you want to end up with, not the change you want made. Describe image is a quick way to get a prompt that matches your picture, ready to edit.
Changing part of a picture
Select area to change… opens the area editor.
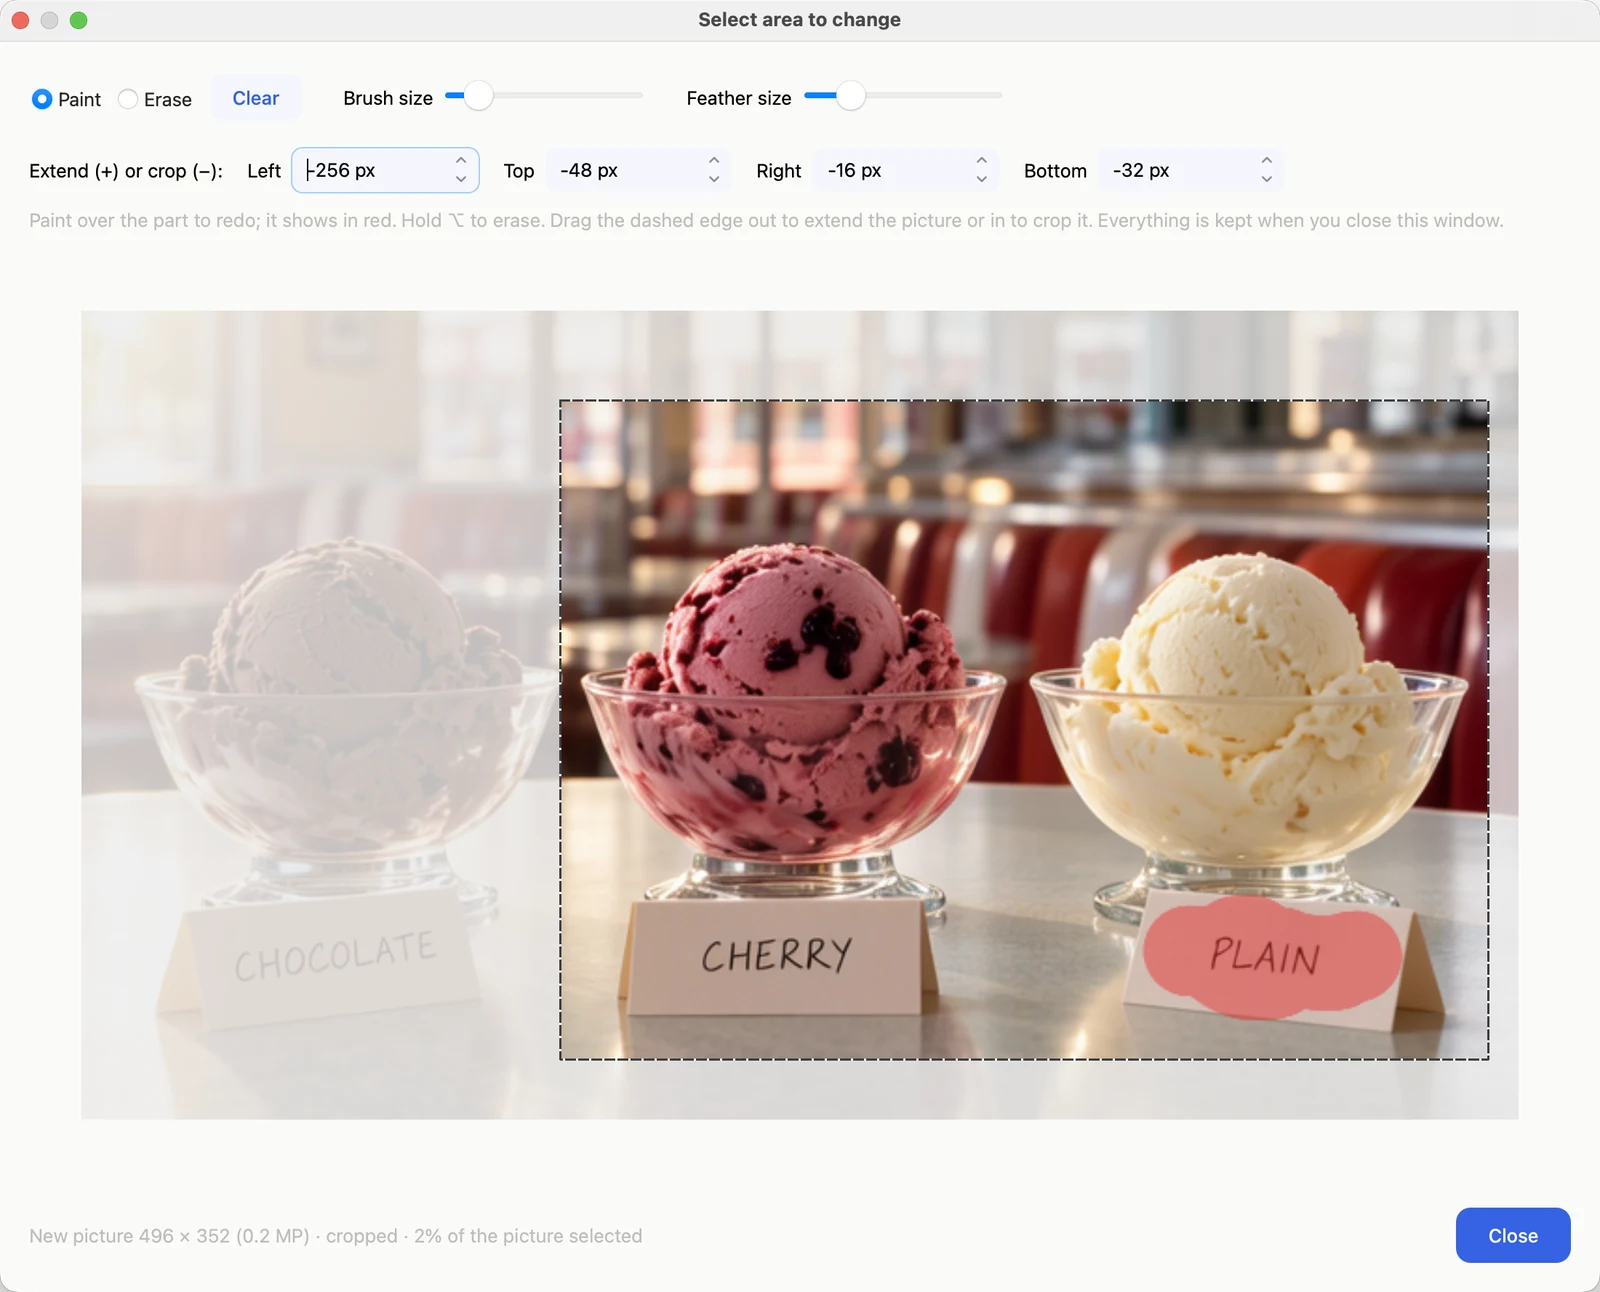
Here the picture is cropped to two bowls, and the card reading PLAIN is painted, ready for a prompt that says “VANILLA” instead.
- Paint over what should change; it shows in red. Erase, or hold ⌥ while painting, removes paint. Clear removes it all.
- Brush size and Feather size (how softly the new part blends in) are beside them.
- Close the window however you like; the selection is kept and shows in red on the picture.
Then write a prompt for the whole picture as it should end up, set Change, and Generate. Only the selected area changes; the rest stays exactly as it was.
- Replace something: Change 1.0, and a prompt describing what should be there
- Fix or restyle something: Change 0.5–0.8
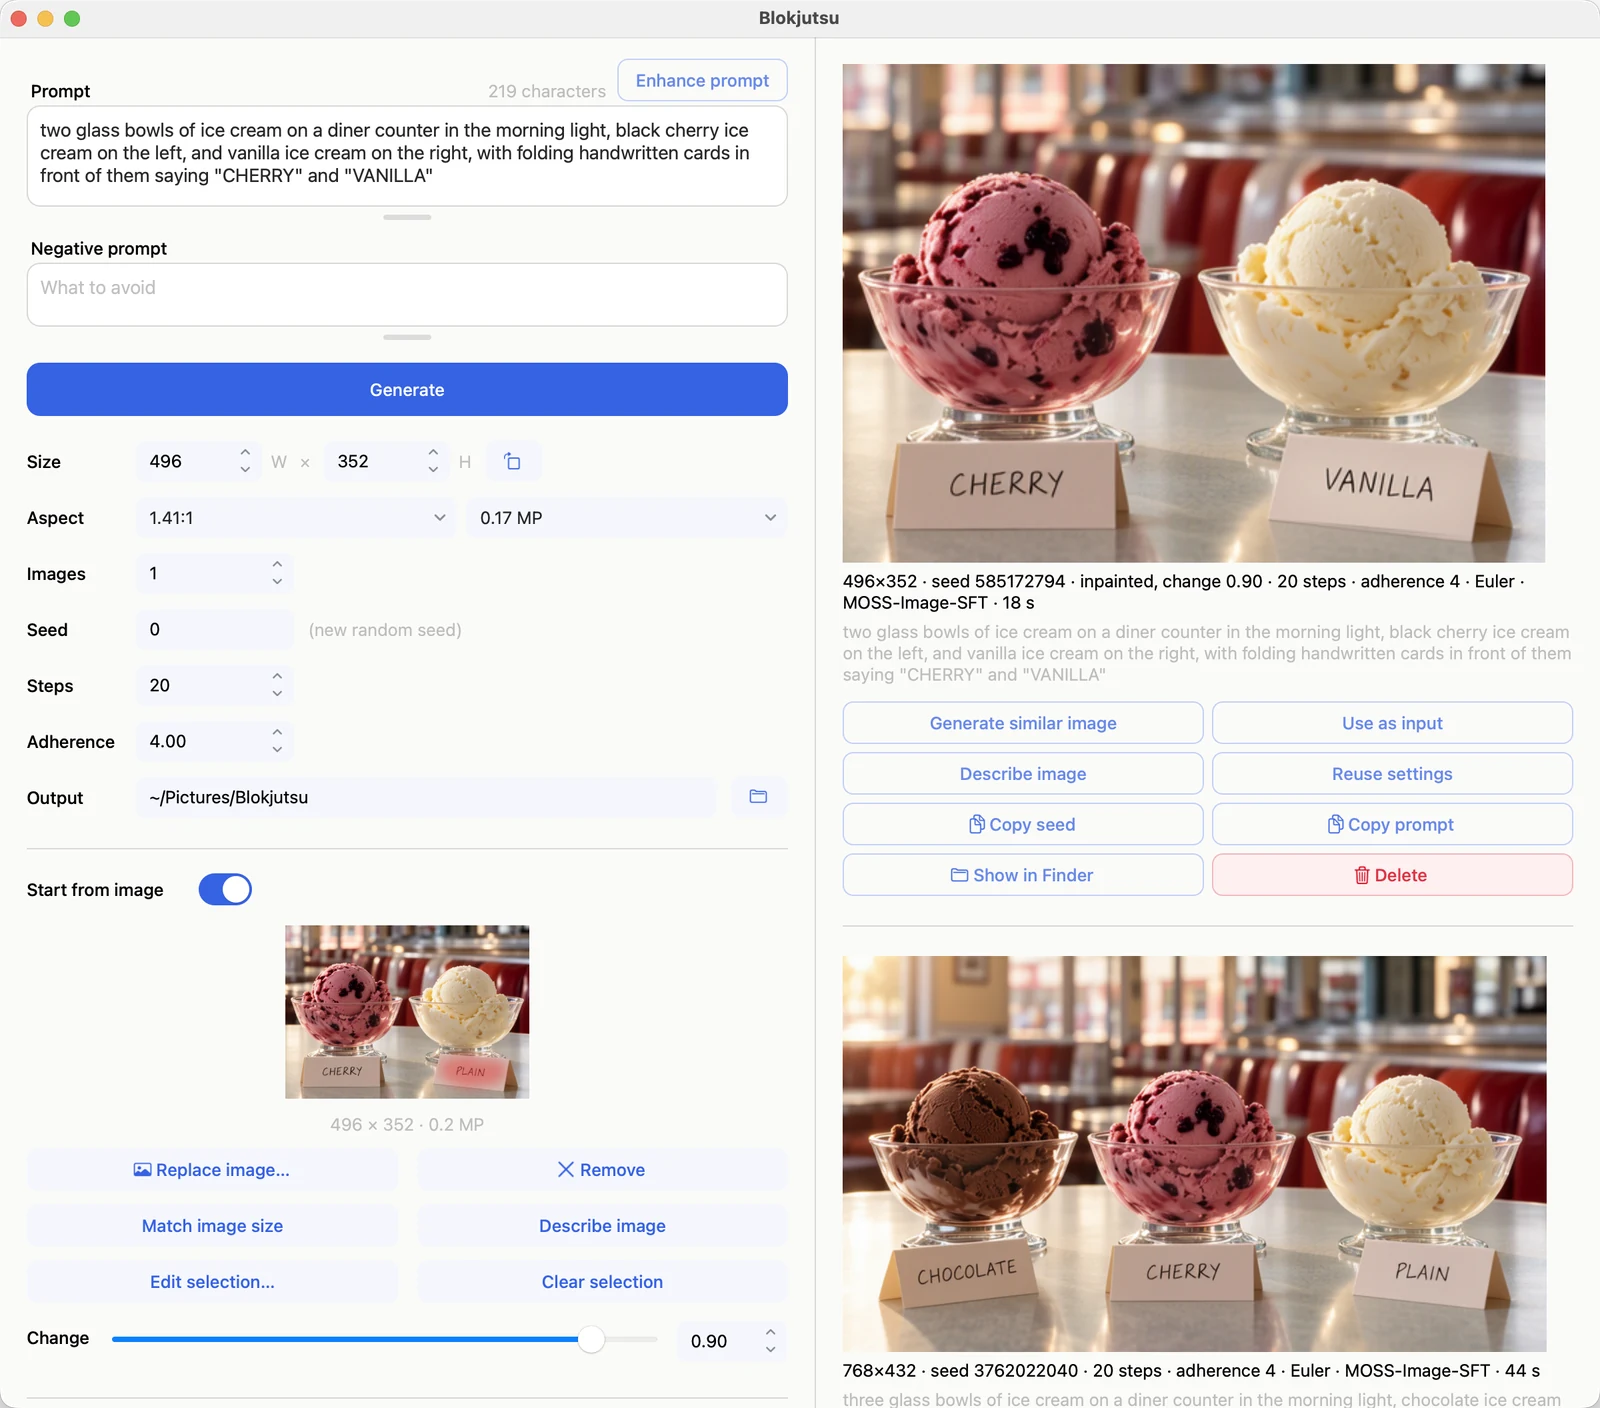
The prompt now names the cards “CHERRY” and “VANILLA”. On the left, Start from image shows the cropped picture with the painted card; on the right, the result, with the original below it.
Extending and cropping
In the same editor, Extend (+) or crop (−) adds space to any side, or trims it. Or drag the dashed edge: outward to extend, inward to crop. Cropped parts show faintly; new space shows in red. Paint under a cropped part is kept, so you can adjust the crop and the paint in either order; only what is inside the frame is used.
New space is always filled in from scratch to match the picture, so Blokjutsu sets Change to 1.0 when you extend. A crop alone simply gives you a smaller starting picture.
Upscaling: making a picture bigger
MOSS-Image makes a good upscaler:
- Start from image with the picture, then Match image size.
- In the MP menu, choose ×1.5, ×2, or more (up to about 4 megapixels).
- Set Change low: 0.01 keeps the picture exactly and sharpens it, quickly; 0.05–0.1 lets the model add new fine detail, more slowly.
- Use the picture’s own prompt (Reuse settings, then switch Start from image back on) or Describe image.